Beginner’s Guide: Setting Up Your YouTube Channel From Scratch (Step-by-Step)
Are you ready to turn your passion into a thriving YouTube channel? Whether you’re dreaming of sharing lifestyle vlogs, gaming walkthroughs, cooking tutorials, or tech reviews, starting from scratch can feel overwhelming. But don’t worry—I’m walking you through everything you need to know. By the end of this guide, you’ll have your YouTube channel set up and ready to publish your first video like a pro!
Step 1: Create Your Google Account – Your Gateway to YouTube
Before you can hit record or upload a single frame, you need to create a Google Account. This acts as your digital passport across all things YouTube.
- Visit Google Account Signup
- Choose a strong, memorable password
- Keep this account secure—this will control your entire YouTube brand!
💡 Pro Tip: Consider using a dedicated email for your YouTube channel to keep things organized and professional.
Step 2: Should You Choose a Personal or Brand Account?
Here’s the big question—personal or brand account?
- Personal Account: Perfect if you’re planning a personal vlog, lifestyle updates, or hobby-based content.
- Brand Account: Ideal for businesses, creators planning future collaborations, or if you want multiple people managing the channel.
If you plan to monetize and grow long-term, a brand account gives you flexibility and scalability.
Step 3: Pick a Memorable Channel Name
Your channel name is more than a label—it’s your first impression.
- Keep it short and memorable
- Make sure it reflects your content niche
- Check that it’s easy to spell and pronounce
📌 Example: If you’re into tech reviews, something like “GadgetGuru” sticks better than “John’s Tech Explorations.”
Once you’ve chosen your name, claim a custom URL through YouTube settings. This makes sharing your channel easier and adds credibility.

Step 4: Design a Professional YouTube Channel Layout
Think of your channel as a storefront. A clean, visually appealing layout encourages visitors to explore more.
- Add a compelling channel banner (size: 2560 x 1440 pixels)
- Upload a clear, high-quality channel logo
- Organize your content using the “Featured Sections” option
🎨 Use free design tools like Canva or Adobe Express to create professional-looking graphics—even if you’re not a designer.
Step 5: Craft Your Channel’s Visual and Content Identity
Your channel’s look and content should align to tell a cohesive story.
Visual Identity:
- Design eye-catching channel art and logos.
- Stick to a consistent color palette and style across thumbnails.
- Create a recognizable thumbnail template to maintain brand consistency.
Content Identity:
- Choose a content theme: Tutorials? Product reviews? Travel vlogs?
- Define your target audience. Are you speaking to beginners, professionals, or hobbyists?
- Decide on your video tone: Fun, educational, inspirational, or a mix.
Step 6: Write a Keyword-Rich Channel Description
This is your opportunity to boost visibility.
Include:
- Primary keywords related to your niche
- What viewers can expect from your content
- A clear value proposition
📌 Example: “Welcome to GadgetGuru! We bring you weekly tech reviews, unboxings, and tutorials to help you make smarter buying decisions. Subscribe for the latest gadget insights every Monday!”
Step 7: Organize Your Content with Playlists
Playlists don’t just keep your channel tidy—they help improve viewer retention and watch time.
- Group related videos together
- Create playlists around popular keywords (e.g., “Best Budget Laptops 2025”)
- Feature playlists on your homepage for easy navigation
Step 8: Create Your First Video – Keep It Simple and Authentic
You don’t need a Hollywood budget to make your first video stand out.
Equipment You Can Start With:
- Smartphone (modern models have excellent cameras)
- Natural lighting or a simple ring light
- Lavalier mic for better audio clarity
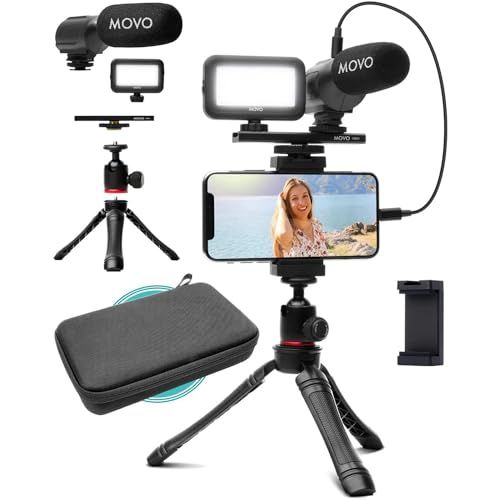
YouTuber Equipment
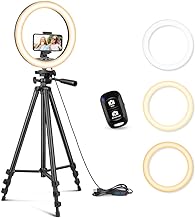
Tripod Stand
Filming Tips:
- Script or outline your content to stay focused
- Film in a quiet environment
- Keep videos concise—aim for 5-8 minutes initially
Editing Made Simple:
- Use free editing software like iMovie, DaVinci Resolve, or HitFilm Express.
- Focus on clean cuts and smooth transitions.
- Add royalty-free background music to keep energy high.
Step 9: Optimize Titles, Descriptions, and Thumbnails
This is where the magic of YouTube SEO comes in!
Crafting Effective Titles:
- Use relevant keywords early in the title
- Include numbers or power words (e.g., “Top 5 Camera Hacks for Beginners”)
- Keep it under 60 characters
Writing Descriptions:
- Add primary and secondary keywords naturally
- Include important links (social media, website, affiliate links)
- Write at least 250 words to help YouTube understand your content
Creating Thumbnails:
- Use bold text and high-contrast images
- Show expressive faces—thumbnails with emotions perform better
- Stay consistent with your thumbnail style
Step 10: Upload and Publish Your First Video
When uploading, don’t skip the details:
- Select the right category
- Add tags with relevant keywords
- Choose an attractive custom thumbnail
- Schedule for optimal posting time (check your target audience’s time zones)

Step 11: Promote Your Channel and Videos
Your job doesn’t end after uploading!
Promotion Strategies:
- Share clips and teasers on social platforms like Instagram, TikTok, and Twitter.
- Engage in YouTube communities by commenting on related videos.
- Collaborate with other small creators to cross-promote.
💡 Tip: Create a simple website or blog to embed your YouTube videos for additional traffic and monetization opportunities.
Step 12: Build a Loyal Community Through Engagement
The secret to long-term YouTube success? Build relationships.
- Respond to comments—let your viewers know you’re listening.
- Ask questions in your videos to encourage comments.
- Host giveaways or live Q&A sessions to boost interaction.
Step 13: Analyze, Improve, and Repeat
Monitor your progress using YouTube Studio Analytics.
Key Metrics to Watch:
- Audience Retention: Where are people dropping off?
- Click-Through Rate (CTR): Are your thumbnails and titles enticing enough?
- Watch Time: Longer watch times help boost your video rankings.
Experiment with different content styles and formats to see what resonates.
📈 Common Questions Beginners Ask:
- How to Start a YouTube Channel Step by Step for Beginners?
Follow this guide! From creating a Google Account to optimizing your first upload, everything you need is right here. - Can You Make $1,000 a Month on YouTube?
Absolutely! With consistent content, proper monetization strategies (ads, affiliate marketing, brand deals), and audience engagement, it’s very achievable. - How Many Views Do You Need to Make $1,000 on YouTube?
This depends on your CPM (Cost Per Mille). On average, you might need between 100,000 to 250,000 views monthly. But adding affiliate links and sponsorships can help you reach that number faster.
Final Thoughts: Ready to Launch Your YouTube Journey?
Starting a YouTube channel from scratch is one of the most rewarding creative journeys you can embark on. Whether you want to share your hobbies, educate others, or eventually turn your channel into a profitable business, the time to start is now.
So, what’s stopping you? Grab your camera, hit that record button, and let the world hear your voice!
👉 Need help growing your channel? Drop a comment below with your biggest YouTube challenge—let’s tackle it together!

Larry Mac
Hi there, and thanks for stopping by! My name is Larry, and I’m the voice behind 6fig.com. I search the Internet to try and find Money making opportunities to share.. Thanks for stopping by, feel free to subscribe and comment. Thank You!
You Got This, I Learned these skills and More at Wealthy Affiliate. Hey if this 65 year old Grandfather can make money online, you can too!
This website got me on the path to making money online! Click Here to Start!